Friday, 12 August 2016

LANLEE Projects: How to make Planters from Galvanised Buckets

Lanlee Projects #1 

How to make planters from galvanised buckets


For This DIY You Will Need
  • 1x Bottle Methylated Spirit
  • 1x Clean Rag/Cloth
  • 1x Tin of Galvanised Metal Primer (I used Hammerites 'Special Metals' primer)
  • 1x Wire Brush
  • 1x Drill (or other tool suitable for putting holes into the bottom of the bucket)


Clean - To remove the 'grease' from galvanised metal and to create a smooth, clean surface for painting you should first wipe down the bucket with some methylated spirit and a clean rag or cloth. You can definitely 'feel' a difference in the bucket after you have cleaned it.   I did also find that this to be a necessary process (even when using a new, clean bucket like mine) as the primer stuck better to the parts of the bucket that were cleaned more thoroughly.   Brush -  If you'd like the galvanised parts of your bucket to have a 'brushed steel' look then you can brush the bucket with a wire brush using horizontal or vertical motions to get this look


Prime - Due to the zinc coating on newly galvanised metal you cannot simply apply a couple of coats to the metal straight away and must prime it first with a suitable metal primer, In this case I have used 'Hammerite, Special Metals Primer' however, using an 'etch primer' would also work just as well.  I applied just one coat of the primer as instructed with the wider 2" brush which took about 30 minutes to dry, however the tin recommended waiting a total of two hours before painting back over the primer with other paint.  Surprisingly this primer is a red/pink colour and dried on the bucket as a red similar to the red colour in our LANLEE logo. I also noticed after going to check on my bucket that some of the paint had gone over onto the inside of the bucket. Because It was such a small area that I needed to remove the primer from I decided not to use a wire brush to get the paint off, but instead the same methylated spirit and rag that I had used to clean the bucket earlier. After I had got the worst of it off, I went around the inside (just below the lip of the bucket) with the masking tape that I had purchased for the design part, and then repainted over the masking tape.


Prep - Because the primer had turned the bucket a red colour, before painting I wanted to make sure that you would still be able to see the natural galvanised surface in between the triangular blocks of colour that I was going to add. This meant that I then had to apply pieces of masking tape where I wanted the galvanised surface to show through, I traced the outline with a pencil and the removed . This meant that I could then apply more masking tape in pairs along the outside of these lines. I then used a wire brush (that I had bought for a future project) to brush off the primer and reveal the galvanised surface beneath and removed the tape.  In retrospect I would definitely have applied the masking tape before priming as this step took quite a long time, and it was difficult to go over all the small areas with the wire brush to remove the primer.  Then....  You will need to do a little bit of prep work. All you need to do is place a few strips of masking tape at slight angles from the top to the bottom of the bucket as shown below...and then  add  a few more at more horizontal angles along the bucket. To avoid the masking tape sticking too strongly to the bucket you could stick and unstick the tape to and from one of the paint tins. doing this about three times for every strip of masking tape will stop the tape adhering too strongly to the bucket and wont leave behind any hard-to-clean residue. Also, if there are any grooves in the bucket, make sure to press the masking tape down flat along these parts, doing so will make sure no paint seeps through to the galvanised parts when painting.


Paint - I then began to paint in the spaces left with my yellow and turquoise paint. I tried to plan this out so that no yellow would be next to another yellow  shape and no turquoise would be next to another turquoise shape, and this worked out pretty well.  Because the primer was such a strong colour I had to go over it with quite a few coats of the paint. The turquoise took 4 coats and the yellow took about 5-6 Coats.   When I had applied enough coats of paint (and it all had dried of course) I removed the masking tape from the bucket. Around the places where the bucket was flat the paint showed up in crisp straight lines, however along the grooves It was not as neat. To get rid of this excess paint I went back over it with some turpentine and the same rag I had used to paint the bucket and was successful in managing to get almost all of it off.


Plant - Once I had finished with the painting part I began to start thinking about what I was going to do with it. I got a colleague to drill a few holes into the bottom of the bucket and then proceeded to add my soil and some plants that I had bought from the garden store which cost me just under £10.00 in total.  If you have your own garden ( unlike me) you could even transfer a plant, or a few plants from your garden into the bucket instead.   If you will be placing your plants outdoors in a place where it will be exposed to lots of sunlight it is recommended that you purchase some moisture crystals to keep the plant hydrated as the bucket will retain the heat.


Overview -  Overall The bucket turned out really well and was quite cheap to make. I also had a lot of Ronseal Multi-purpose Garden Paint left over that I could use on future projects whether it be on wood, brick, stone, terracotta or galvanised metal.  If I was to do this project again I would have definitely applied the masking tape in the shapes that I wanted before putting the primer on, This would have meant that I wouldn't have had to spend more time wire brushing the bucket to get back through to the galvanised surface beneath.  I would have also tried to find a primer which was not such a strong colour so that I didn't have to apply as many coats of the paint to the bucket to cover up the strong red colour.

Wednesday, 8 June 2016

What Is Composite Decking?

Lanlee Explains
What is Composite Decking?


Composite Decking is quickly overtaking traditional wooden decking as the most popular choice of decking for home-owners across the globe. Boasting to be a low-maintenancehighly durable and eco-friendly alternative to wooden decking, in this article we explore the core differences between wooden and composite decking.


Composition

Wooden Decking 

What Wooden Decking is made of is really in the name, although there are a few different types of wooden deck that you can purchase which all have different features and vary in price. 

The most commonly used decking material is 'Pressure Treated Timber'. It is the most affordable & widely used material and is chemically treated to resist rot and decay. Pressure treated decking requires regular maintenance too, this may include an annual power wash and an application of stain or clear wood preservative every two or three years.


Composite Decking

Composite Decking products blend waste wood fibre & recycled plastics, adding in waxes, fibreglass, and preservatives to form wood like boards.


Features


Wooden Decking

A natural wooden deck has beautiful aesthetic quality which many UPVC and Composite Decking brands try to imitate, however nothing can really match the look, feel and even smell of natural wood. 

Wooden decking has a high strength to weight ratio and, though it does require more maintenance than its composite counterpart, with the right care wooden decking can last just as long, or even longer, than other plastic alternatives.

Composite Decking

Working with composite timber is very similar to working with wood. However, composite lumber has the added benefit of being less likely to split or de-laminate. Composite Decking is also more stain, scratch and mould resistant than wooden decking and so requires much less maintenance.


Sustainability and Environmental Issues


Wooden

Wooden decking without any treatments on it can be easily recycled and bio degrades without any polluting by-products. Plain, untreated wooden decking is non-toxic & extremely strong for its weight.

Unfortunately, once you treat your timber decking it can no longer be recycled or burnt, due to the toxic chemicals found within timber treatments.


Composite


Composite decking products are known to last much longer than timber decking. They make use of materials that may otherwise have ended up in a landfill site. However, the biggest problem with composite decking that it is almost impossible to recycle. This is due to its use of both biological components (such as wood) and technological components (such as plastic) which are inextricably blended.


Cost

Wooden Decking is a lot cheaper to buy than composite, however unlike with composite, you will have to pay money for treatments and stains to keep your decking weather resistant and looking nice whereas most Composite Decking types only require to be washed with soap and water.


Average Life time


Wooden Decking

Depending on how well you maintain it, wooden decking can last anything from 15-30 years, however the average lifetime is about 20 years. Rot, algae growth, warping  and splintering can all contribute to rapid ageing of wooden decking so it is important to take the correct measures to try and prevent these for as long as possible. These measures can be simple things such as cleaning your decking once a month with a quality decking cleaner. 


Composite Decking 

Most manufacturers offer a 20 year warranty on their composite decking, however  unlike wooden decking, composite boards do not tend to rot, splinter or warp. When composite decking ages the colour tends to fade overtime and it can generally just look less attractive which could cause the home owners to want to replace it after this time.


Sources:
http://greenlivingideas.com/2007/12/17/sustainable-decking-solutions/
http://www.popularmechanics.com/home/outdoor-projects/how-to/a7889/should-you-build-your-deck-from-wood-or-plastic-11226815/


https://en.wikipedia.org/wiki/Composite_lumber

10 Interesting facts About the Leeds Liverpool Canal

Title photo: five interesting facts about the Leeds and Liverpool canal

At a whopping 127 miles long, the Leeds & Liverpool Canal holds the record for being the longest canal in Britain built as a single waterway. It took a total of 46 years to complete!

The tunnel at Foulridge was opened in 1796. A tale that has passed into local folklore tells of a cow that fell into the water and swan the whole length of the Foulridge Tunnel before being pulled out at the other end and revived with brandy


In the 1950's & 1960's, waterway enthusiasts including members of the Mersey Motor Boat Club tried hard to keep the canal open and navigable using a variety of boats including converted life boats

Following the £22 million creation of the Liverpool Canal link, the Leeds and Liverpool Canal now extends right into the hear of Liverpool's historic Albert Dock.

Celebrating 200 years of the Leeds-Liverpool Canal - www.lanleesupplies.co.uk Photography: ©mollysoutham2016  Music: http://www.purple-planer.com


Tuesday, 15 March 2016

The Best Sheet Material?

Lanlee Guide

Which is the Best Sheet Material for Your Project?


Currently there is a huge selection of different plywoods available to buy on the commercial market, and the list just seems to keep increasing. In response to this, the team at Lanlee Supplies has decided to create this article in which we will discuss what Plywood is and its benefits to you as the consumers, as well as the difference between the five types of Plywood that we stock at Lanlee and their varying uses. Hopefully this post will answer any question you may have!


Birch Plywood


Birch Plywood is one of the most popular and versatile Plywoods. It is very safe to use due to its smooth finish, and its lack of knots and jagged edges. The benefits of using Birch Plywood include:

-Attractive look and finish
-Multitude of uses
-Can be easily painted/treated/stained
-Strong and durable

Birch Plywood can be used to make anything from home furniture to boats. Birch Plywood is suitable for almost anything that requires an attractive, versatile and strong material to make it.


MDF (Medium Density Fibreboard)


MDF is an engineered wood-based sheet material. It is made by bonding together wood fibres with a synthetic resin adhesive and can be used for both interior and exterior applications. Some of the beneficial features of MDF include:

-Cheap to buy
-Strong
-Can be easily machined
-Very easy to paint

MDF is used to make many different types of indoor furniture such as display cabinets, wall panels, storage units and many other things


OSB (Oriented Strand Board)


OSB is made with high quality veneers which are cross laminated for extra strength, especially in high moisture areas. OSB is

-Extremely strong
-Highly durable
-Versatile
-Contains no knotholes, voids or points of weakness

Some of the many uses for OSB include shelving, garages, sheds, packing cases and any general joinery.


Chinese Plywood is lighter and more flexible than other plywoods, and can be bought cheaply. However, as a consequence of this, Chinese Plywood tends not to have the strength or smooth finish that most other plywoods have. Chinese Plywood has the following properties:

-Often much cheaper than other alternatives
-Lighter in weight
-Flexible

Due to its features Chinese Plywood is more suitable to be used in projects where it’s appearance or strength are not relied upon heavily, such as in projects where it won’t be seen or for things such as packaging.


Hardwood Far EasternPlywood


“Far Eastern” Plywood is a rigid Plywood which can be utilised for both internal and external joinery effectively. Features of Hardwood Far Eastern Plywood include:

-High weight to strength ratio
-Designed to resist warping and bending
-Smooth sanded surface

Far Eastern Hardwood Plywood can be used for benches, walkways, garages and shelving. “Far Eastern” Plywood is not suitable for structural building.


Marine Plywood


Marine Plywood is constructed to deal with damp conditions and, due to its special construction, Marine Plywood has the following properties:

-Resistant to bending/warping
-Extremely resistant to rot and decay
-Very durable
-Has great structural strength


Marine Plywood is most recommended for use on ships, at docks or even within bathrooms, en-suites, kitchens or any other places prone to damp. 


Anti-slip Plywood is designed to ensure extra safety for its users, whilst still maintaining the strength and durability of a ‘normal’ plywood. Some of the beneficial features of Anti-Slip Plywood include:

-Extremely Durable
-Easy to Clean
-Resistant to Chemicals
-Can be easily machined and fastened using conventional wood-working tools and fasteners


Due to its highly slip-resistant wire mesh surface, using Anti-Slip Plywood ensures excellent loading safety. Anti-slip Plywood is also recommended for use in any places that are prone to slipperiness or that are exposed to weathering.


For more tips and information please visit our website  and like us on Facebook

Wednesday, 3 February 2016

How to Grow Your Own Food With No Garden

How to Grow Your Own Food with No Garden


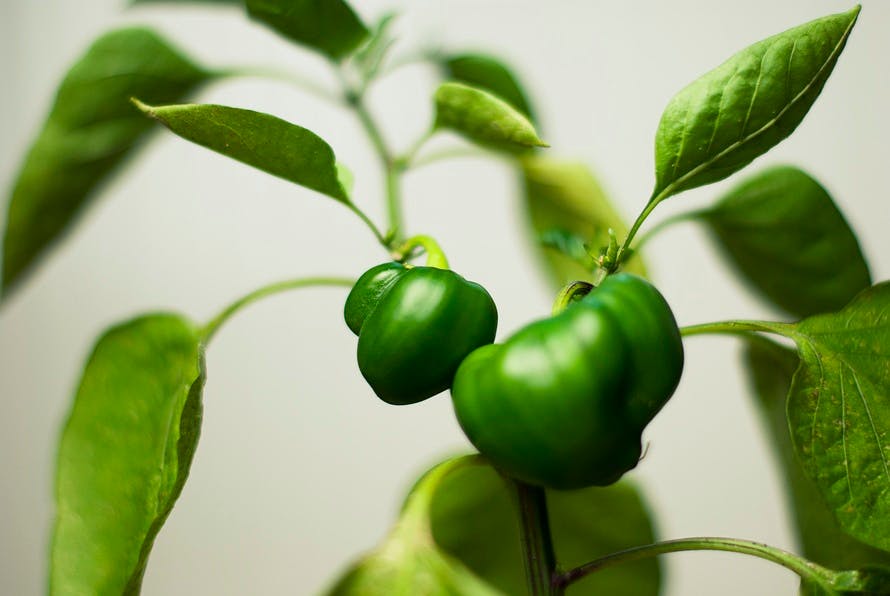
 plant, leaves, green


Due to rising food prices, and an increased awareness of environmental issues globally almost a third of us Britons are now growing a significant proportion of the food we eat at home. Even if you don't have the lush, green garden space that seems to be required to take part in this growing trend it doesn't mean that you have to be left out. In this article you will find lots of useful information on growing your own fruit and vegetables indoors including why it is relevant to you.


What to Grow?


Tomatoes, Green Beans and Peas, Mushrooms and Herbs are generally the easiest foods to grow indoors as they do not require a lot of depth for their roots or space for their yield. You can also buy 'Grow Your Own' Kits which come with all the items you could possibly need to grow a variety of fruits and vegetables with limited space.


Where to Grow?


Conservatories and windowsills are great places for indoor plants as it allows the plants to receive plenty of the natural sunlight which they need to grow. To save space indoors, and make the outside of your house more lively some plants can be grown in hanging baskets or other similar containers which can be placed or hung outside of your house.


Who can Grow?


Anyone and everyone can grow their own fruit and veg at home. In fact it makes the perfect activity to stave off boredom, and can make a great activity for those with young children as it helps to teach them about where their food comes from and how it grows. All you need is some seeds or bulbs, soil, a plant pot and some patience and you'll be surprised at how good the food you grow actually is.


Why you Should Grow?


You Can Save Money


Though the savings you make may be only minor at first as the length of time you grow for, and the amount of plants you grow adds up you will see this number slowly increasing. You are also less likely to waste food that you have spent time to grow, whereas you may not realise the money you are throwing away by overbuying at your normal shop, so growing your own also helps you to waste less of the food that you buy whilst saving money in the process.


The End Product Will Be Better for Your Health Than Shop Bought Vegetables


By growing your own Fruits/Vegetables you know in exactly what conditions that product was grown in and that it is free from any sort of harmful pesticides. There is also proof that home grown, organic vegetables actually contain a lot more vitamins and minerals than those which you find in generic supermarkets, meaning that every bite contains not just more flavour than shop bought ,but also contributes a lot more greatly to your overall health and well-being.


You Help to Reduce Carbon Emissions


The majority of food sold in our supermarkets has to travel thousands of miles to get there by truck, plane, boat or sometimes even all three. These Vehicles often run on non-renewable, fossil fuels which, when extracted and utilised, release some deadly and polluting gasses such as Carbon Dioxide and Sulphur Dioxide. By growing your fruits and vegetables at home (which do not require to travel huge distances to get to your plate) you help to reduce your own carbon footprint as well as reducing the overall demand for these consequential items.


Encourages You to Eat Better Foods


After taking the time and effort to water and maintain the plants that you grow it is unlikely that you would want to let them go to waste and in fact may be more excited to eat the produce than you usually would if it had been shop bought. 


It Will Liven Up Your House


One of the main attributes of plants is that they are colourful. Invest in some fancy pottery, or even paint your own to place your plants in and it will instantly improve the look of your home as well as your overall mood.


http://greatist.com/health/best-plants-to-grow-indoors (A list loads of easy to grow plants and how to grow them)

You can find lots of gardening tools on our website


For more tips, or information on prices please visit our website and like our Facebook Page

Monday, 4 January 2016

How to Recycle Your Christmas Tree!

How to Dispose of Your Christmas Tree 

(The Environmentally Friendly Way)


The Christmas Season is over and  now you're probably stuck with a huge, shedding, browning tree in your living room. Well do not fear! There are plenty of easy, eco-friendly ways to re-use and recycle your tree, even after it can no longer be used for decoration. We've compiled a short list of just a few of the many easy ways to recycle your Christmas tree! 


Chop It Up

Save money on buying logs and kindling and use your old Christmas tree instead. The trunk and any large branches can be sawn off and used as logs, and any small branches and twigs (as they catch fire easily) can be used as kindling to light your fire. If you don't have a fire to burn our logs on then you can cut them up so that they fit in your garden waste bin and they can be recycled that way.


Make Mulch


Everything on your Christmas tree is biodegradable, meaning that it decomposes over time and releases its nutrients back into the soil. This fact, accompanied with the pleasant smell which many Christmas trees have, mean it is perfect for mulch. Just Remove the branches from the tree and cut them into small pieces using a wood chipper (or by hand if you have the time) and spread them across the ground in your garden.


Create a Bird Habitat


If you place your tree outdoors it can provide the perfect shelter for all types of birds. You can even hang small treats such as suet, stale bread and dried fruit wrapped up in mesh bags on the tree to attract more wildlife to your garden. 


Make Potpourri


Due to their subtle aroma the needles from your Christmas tree can be gathered up and used to make potpourri along with other items that can be easily foraged or bought in most shops such as cinnamon sticks, lavender, small pine cones and holly.

Contact Your Local Council


Some Councils offer free tree recycling services over the Christmas period so you can easily dispose of your tree. Councils usually shred the wood into chippings which are then used in local parks or woodlands. If your Council does not offer this service you should also check with some local garden services as they may be able chop it up into mulch for you.


For more tips, or information on prices please visit our website http://www.lanleesupplies.co.uk/Products/Logs_Firewood_Kindling and like our Facebook Page https://www.facebook.com/LanleeSupplies/